After some texture experiments I decided to apply a mix of sand and glue to my portable gaming board.
1 part PVA glue and 5 parts (wet) sand were mixed and applied to the surface of each gaming board. If the sand would have been dry, adding water would have been necessary.
I used approximately 7-8 dl glue for all three boards.
I used a large brush to apply the mix onto the surface, and a roller to even the mixture on the board.
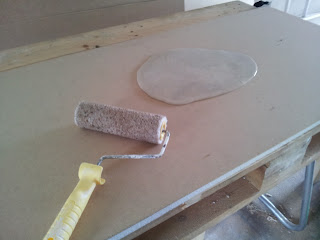 |
| Yummy! |
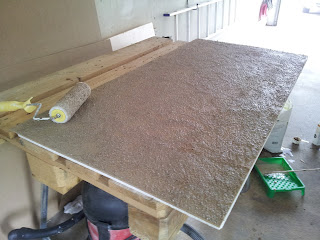 |
| One board done. |
One improvement I came to think of during the work process is that I probably should have placed all three boards side by side when applying sand, to get a more seamless appearance. Although, it should be quite easy to fix with a thin second layer of sand on the edges.
Caution! Brushes and rollers involved in this process will not be usable for painting afterwards.